BC Idea | Enable Unlimited Over-Receipt
Yesterday on Yammer, a user reported that the Over-Receipt functionality was rather useless in cases where quantities are very minimal but still prone to over-receipt. For example, if the quantity on the line is 1, but the vendor sends 3, you wouldn’t be able to cover this scenario with out-of-box Over-Receipt, since the maximum tolerance is 100%.
That’s when user Kilian Seizinger mentioned that he had already created a BC Idea to support unlimited Over-Receipt.
This idea was not voted a lot since its initial posting on 2/6/2023 (17 votes), but still, I thought it was a quite valid and straight-forward idea to develop.
Let’s review the request:
Right now we are limited to 100% Over-Receipt.
It would be very helpful, if we can specifiy a Over-Receipt Code for one vendor to accept unlimited Over Receipt.
I started by briefly checking the source code to see what type of restriction was in place that would prevent values above 100%, and thankfully, the restriction was not set directly on the field level. Instead, it was well written up in codeunits that provided subscribers to change this behavior.
Implementation Details
The initial thought was to just allow users to enter a humongous value on the “Over-Receipt Tolerance %”, such as 9999… It’s a very practical approach, but also it feels a bit lazy, and it doesn’t follow patterns that you can find in other parts of the system…
For example, if we take a look at the Approval User Setup page , we will see that users have the option of either entering a Sales Amount Approval Limit or setting Unlimited Sales Approval:
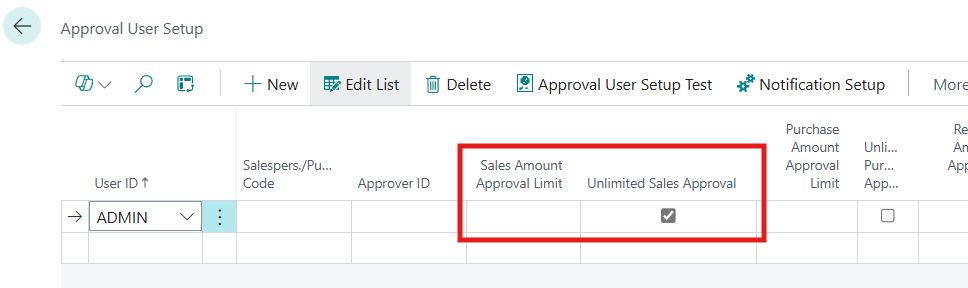
Options on the User Approval Setup page
Therefore, I followed this pattern and created the “Unlimited Over-Receipt Tolerance” field on the Over-Receipt Code table (Over-Receipt Codes page ):
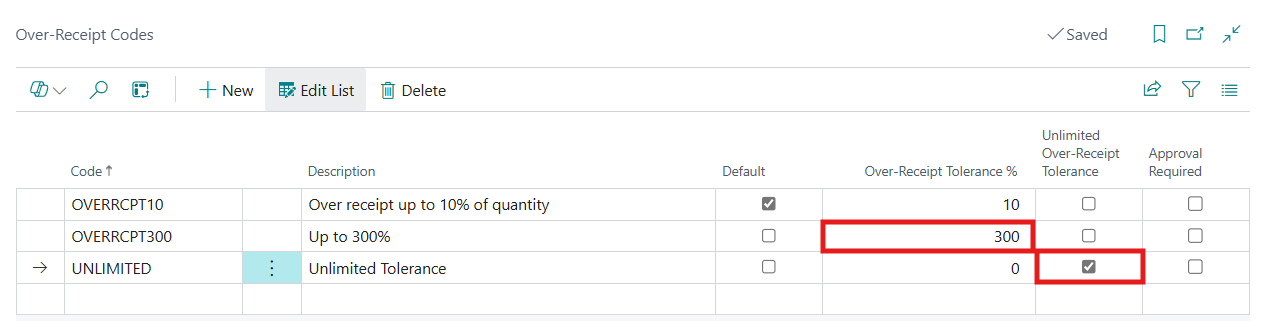
New Unlimited Over-Receipt Tolerance field
For me to allow this flag to work accordingly, and to also allow values above 100% (but no necessarily unlimited), I subscribed to 2 events:
Table Over-Receipt Code:OnBeforeCheckMinMaxValue
- This event is triggered at the OnValidate event for the Tolerance % field. This will allow me to enter values above 100%.
Codeunit Over-Receipt Mgt.:OnVerifyOverReceiptQuantityOnAfterCalcShouldCallError
- This event is triggered when BC already detected that an Over-Receipt is happening. In this case, parameter ShouldCallError already contains a value determined by BC if it should error out or not, due to over-receipt exceeding the tolerance. (Thank you so very very much whoever came up with this event, as this is exactly where we would want to catch this verification).
With this, implementing this BC Idea was pretty easy breezy. 🍸
Settings
To enable this BC Idea, visit the BC Idea Feature Management page and search for the original title on the list.
Once you enable it, you will find a new setting under Purchase & Payables Setup (under FastTab BC Ideas Features):
- Enable Unlimited Over-Receipt
- This setting will be enabled by default when you activate the feature, and it will allow users to setup a Tolerance % that goes beyond 100%, and they will also be allowed to set an Unlimited Tolerance flag.
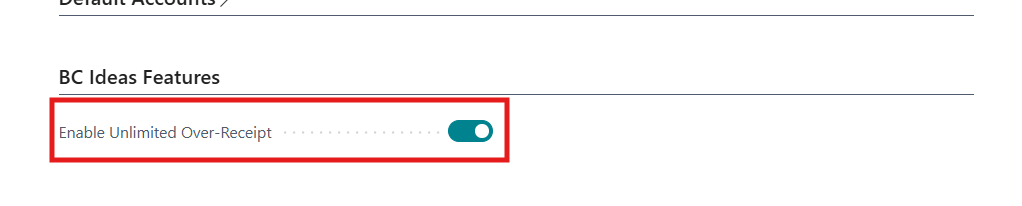
Purchase & Payables Setup page
To disable this, you can either disable the setting on the P&P Setup, or you can disable the BC Idea feature altogether.
If you need to set permissions on who can enable or disable this feature, you need to restrict this permission on the Purchase & Payables setup.
Disclaimer
If you do enable this BC Idea, please use it at your own risk. Truthfully there’s not a lot of risk here but you have to be mindful of any potential conflicts with other existing extensions in your environment. Also, don’t forget to always try these features in a Sandbox environment first, and have users test it before really deploying to Production.
That’s it! 🎉
If you liked this idea, this development, or if you have questions or comments about this, don’t hesitate to react and/or post on the discussion below (you will need a GitHub account).